Finishing the Bike
To explain the Acewell speedo cable "hack" I needed to convert the hall sensor signal into a consistent digital output. The hall sensor creates a small signal blip on every revolution, which is inconsistent in length and amplitude, but consistent in time. This is incompatible with the Motoscope Tiny, which they tell you directly in the manual. I needed to add a feature that I assume is built into the Acewell gauges that make them work, which is something called a Schmitt Trigger (oooo science). The Schmitt Trigger detects that inconsistent signal blip and converts it into a signal output that is consistent in length and amplitude. I found this awesome and crazy smart Swiss dude named Jörg Hau that makes Schmitt Trigger modules specifically for Acewell hall sensors connecting to various motorcycle gauges, along with a bunch of other cool motorcycle (and non motorcycle) gadgets. The connection was inline-ish, simple and hidden away under the bike. Now I can use the Motoscope Tiny and maintain a stock look without having to add a sensor and gluing magnets to my wheels/rotors.


For the brake lever I had to rearrange the tension spring and move the brake arm to the top hole on the lever arm, which is usually the spring hole. This gave me a comfortable clearance above the swing arm so it doesnt rub. Then after I mounted the chain and the tire was in the correct location I measured the cutoff length for the brake arm because it was too long with the rear sets. I cut the end off, cut longer threads into the arm then planned to replace the welded on spring stopper with two jam nuts. I ended up cutting the threads to the right length so that I didn't need a jam nut, I just ran one nut up against the end of the threads.
I wasn't 100% happy with the way the tank was looking after seeing it on the bike. It looked cool, it just didn't look professionally finished, and I didn't trust that it would last. There was already some rust spots forming under the surface and it wasn't resistant to gas, which I get on the tank almost every time I get gas. I stripped all the clear with aircraft remover so that the sanded metal would not be ruined and cleaned it with acetone. I resprayed the tank with clear gloss paint and then a 2k clear coat in hopes of traditionally sealing the metal. Upon sanding down the orange peel, I burned through the clear coat and decided to throw the whole bike away. Ugh. I stripped the clear AGAIN and have been keeping the rust at bay with boiled linseed oil. For now ill stick with a maintenance style finish. The bare sanded metal always looks nicer than a coated plastic looking tank, so well see how it holds up over time.
Pros: It looks like bare metal, I can actively remove rust spots, its ready for painting at any time.
Cons: It will rust if I don't keep up with applying a finish about once a month and after someone has touched it, its a little tacky feeling and can get on your clothing, and im not a fan of the smell.


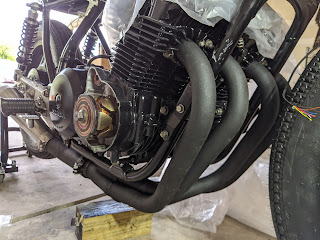
I now needed to work on starting this beast. I used the small gas container to flush some cycles of gas through the tank to get any particulates out, including some sand from sandblasting. I hooked up the throttle and choke cables to the carbs (pain in the ass), installed the fuel petcock, filled the engine with oil (I used 10w-40 per the manual), fixed the neutral switch indicator which wasn't working so I didn't start it in first (frayed wire at the switch), connected the starter cable to the solenoid and filled the tank with fresh gas...and then it was time...to turn the key...which only turns on the power; its a motorcycle, not a car, duh. but, it was time to fire it up. I pushed the starter button and...
She lives! The first couple turn overs showed some life but it wasn't able to idle. I brought the idle up a little and it ran great. Phew! I was so excited to see it running without sounding like a washing machine full of quarters. No clunking, just a swift start and a relatively smooth idle. It may need a little tweaking of the fuel mixture and a fine tune sync but all the attention I put in on the front end paid off. Just need to fill and bleed the brakes, add some fork oil and do some paint touch up and she'll be ready to be revealed.


Comments
Post a Comment