Finished Tank and Electrical Install


Sandblasted | 180 Grit | 1000 Grit


 I got the main electrical components mounted to the electronics tray. I used black flat heads to remain the least noticeable. The horn mounted to the underside of the front. The reg/rec and the spark units mount on the inside of the tray underneath the tank and the m-unit is accessible when the seat is removed. When hiding all of these components it can get cramped and installation gets a little convoluted. The spark units and m-unit can be mounted to the tray before the tray is installed but the horn and reg/rec needs to be mounted after. You can't get to the front tray bolts with the horn installed and you need to pre-insert the front reg/rec bolt while installing the horn, otherwise you can't insert the bolt.

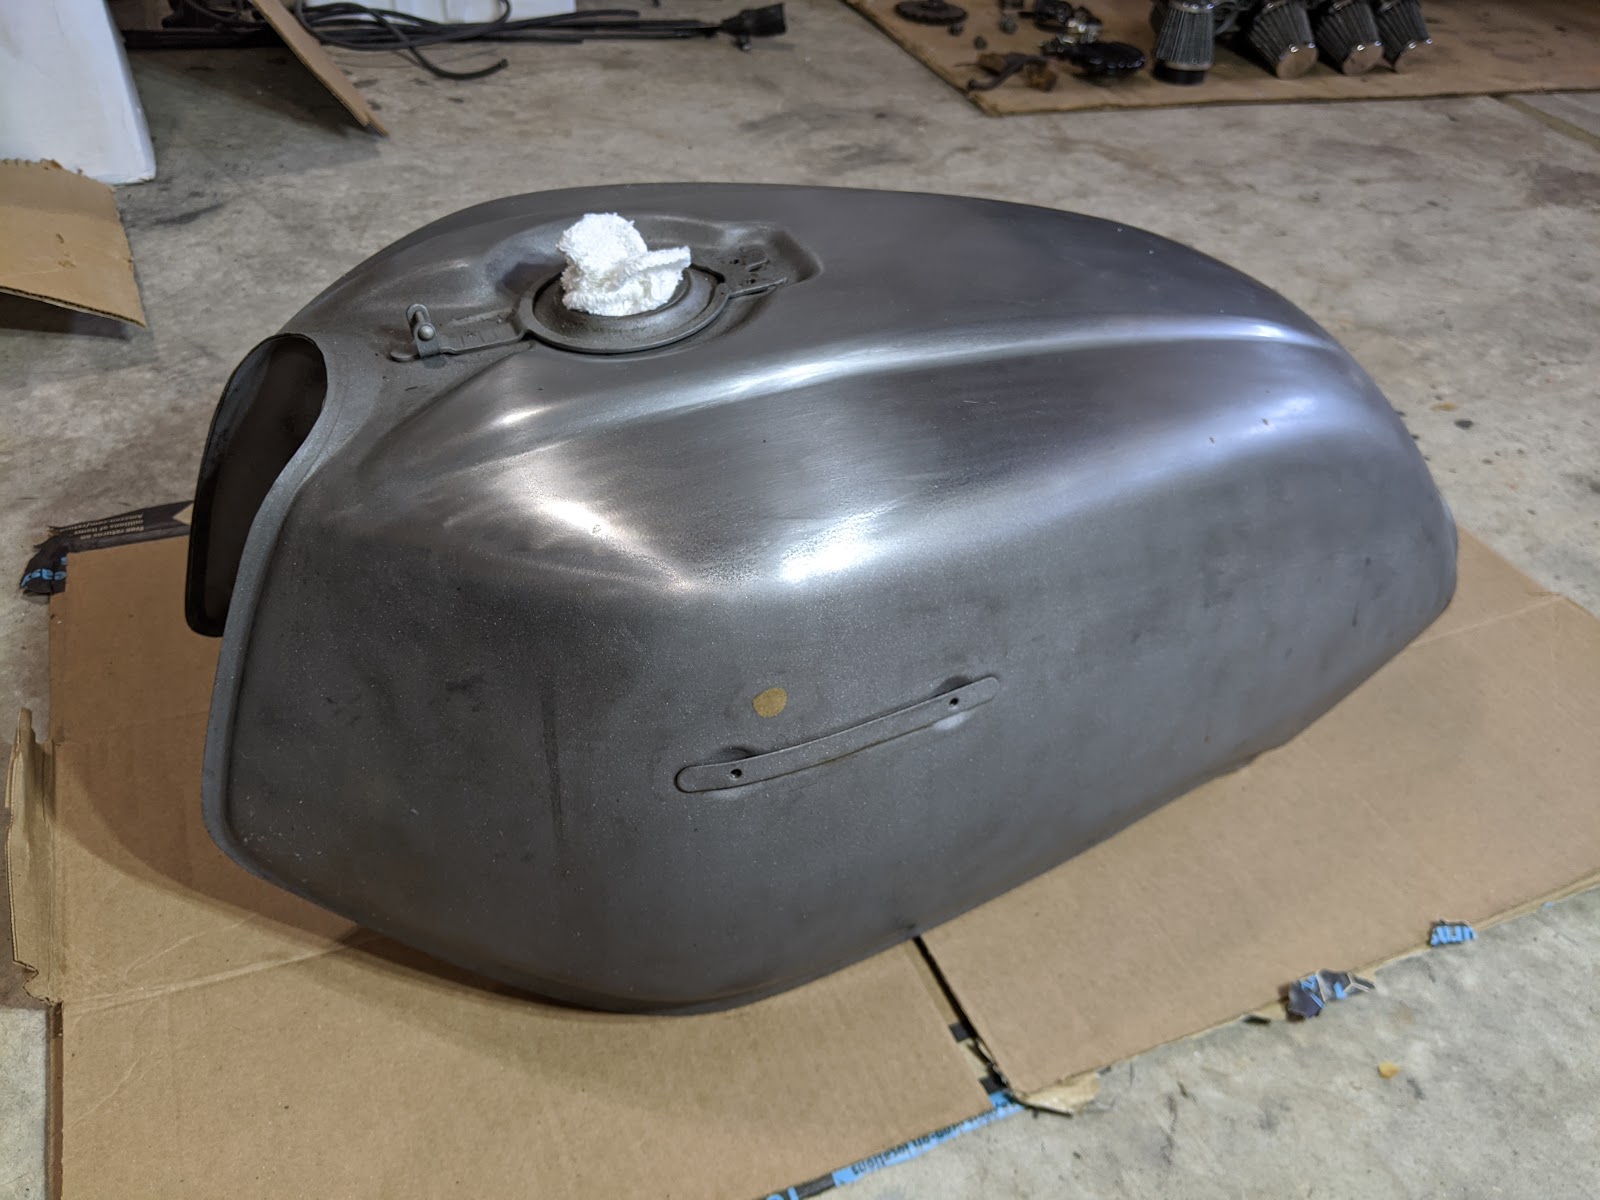
After lots and lots and lots of sanding and some clear coat, I finished the tank and cowl. I decided to go with the raw steel look despite the brass plug and the minor dents, it gives it character, or something like that... I wanted a semi polished brushed finished, which means lots of directional sanding to get the right 'brushed' orientation. I took it to Ben's V-Twins where Ben generously let me use his sandblaster to blast the remaining paint off the tank and get a uniform surface. I wet sanded with a mix of water and WD-40 starting with 180 grit. I went to 320, 400 and stopped at 1000. I left the underside with a sandblasted finish. Sanding and cleaning the tank revealed quite a bit more minor surface flaws from the manufacturing process that I didn't notice when it was rough and dirty (++character). After sanding I cleaned it thoroughly with acetone and compressed air. Then I put on 3 coats of Rust-Oleum satin clear enamel to protect it from rusting. It laid down very smoothly and didn't need post sanding for my desired look, so re-coating it in the future would be very easy. I repeated the same process for the cowl. It turned out great; it reflects very nicely while retaining a brushed visual texture.
Update 8.10: this did not work, had to remove the clear coat due to rusting. Re-sanded tank and cowl to 1000 grit and coated in boiled linseed oil.
(No judging tank pictures from here on, I finished the tank after this work.)


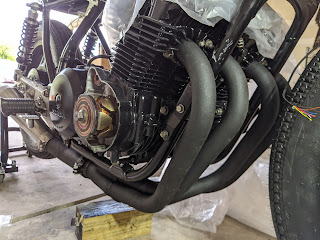
As I mentioned it get cramped very quickly, so it will take a lot of planning to make it look clean once I start wiring. I will use some of the stock connectors where it makes sense, but I will have to shorten some wires to make the best use of the space. The starter solenoid did not fit in the tray so I modified the stock bracket and mounted it to the center tube in front of the tray. You can see it on the other side of the center tube in front of the tray. The solenoid/battery connectors can run on top of the brace as there is plenty of room under the tank when it's installed so the wiring doesn't need to sit too flat. When everything is installed I want none of it to be seen from normal viewing angles. You can see even from the side view with the tank and seat installed you can't see starter solenoid, horn or the mounting bolt heads; you have to get down pretty low to see them.

Enough though it will have keyless go, I got a new on/off ignition to enable the m-unit lock/on input so it can function without the blue tooth features if your phone dies or you just don't want to use it. The old one was much too large with with the steering lock. The motoscope tiny mounts in the old ignition location so I mounted it right below the rear right side of the tank, by your right knee via a bracket that attaches to the inside of the electronics tray and bends down under the frame tube making it easily removable as well.
I spent some time aligning the front wheel in between the forks. I knew I had 77'-78' forks but that shouldn't have caused the wheel to be off center. After investigating I found that the triple tree fork to fork distance measured 192mm. Everywhere online lists the fork width to be 182mm for 79'-81' CB750Ks. I found an Australian article about 1981's stating they widened the forks that year. I don't remember if the wheel was centered before I took it apart... The dual brake systems require you to swap sides of the front axle to capture the speedometer gear. This made the wheel 1/32" off center and the axle too short so I ordered some axle shims. The 1980 CB750F brake system was also off because the rotors were too far away from the caliper. I had planned on moving the calipers closer to the brakes but it looks like 1981 CB750F's have spacers in between the wheel and rotors to bring them closer to the calipers, so I bought a set of those. Well see how those work out.


For the less exciting street legal aspect of this build, I fabricated the license plate mount. I've seen a lot of license plates mount vertically but I don't think that's gonna fly in North Carolina, horizontal it is, tucked as far in as it can go. It mounts to the existing tapped hole in the swing arm previously used to mount the chain guard. The height is set by an L shaped slider bracket attached mid plate arm and rests on the drive chain adjuster. I am going to square it up and then paint it black, same as the frame color.
The rest of my front controls and exhaust components have been stuck in the USPS void for almost a month now; and its making me lose my mind. No one has any explanation other than "its just how things are with COVID right now." Okay thanks. I would really like to have everything installed and laid out before wiring so I am pretty much at the mercy of getting those parts to get the electrical started unfortunately. Till then ill be adjusting the cam bucket shims and getting the head back on.
See ya in the next one.


Comments
Post a Comment